搭建CLI步奏过程不详细介绍了
主要利用Vue.component()注册全局组件,滑动效果使用了translateX
如下图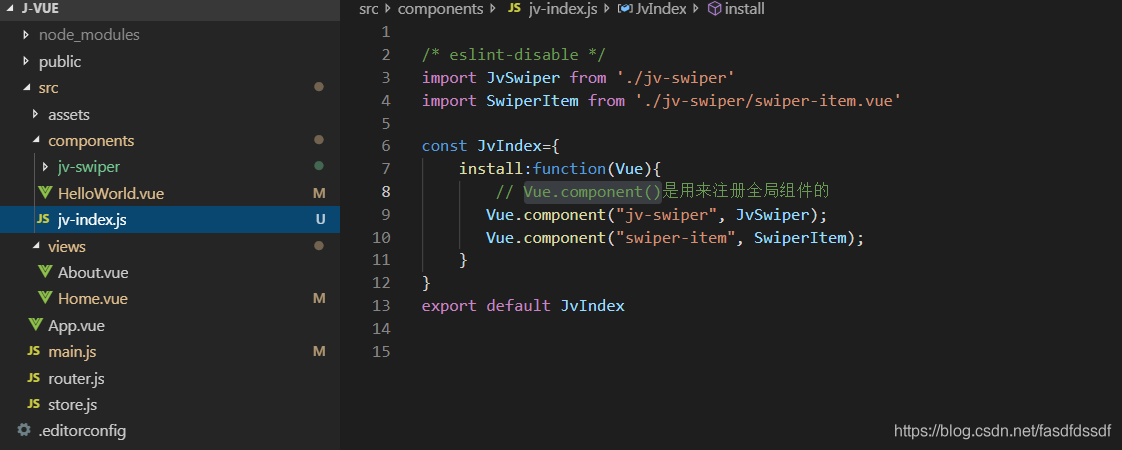
让后开始详细介绍如何实现自己的轮播组件
一.新建jv-swiper文件夹
1.1、然后在jv-swiper文件夹新建index.vue ,该vue其实为swiper的外层控制
<template> <div class="jv-swiper" ref="swileng"> <slot></slot> <div v-if="indicator==='true'" class="indicator-box">//此段代码为指示器,轮播的小点点 <div v-for="(i,index) in jv_siwdom" :key="index" :class="jv_siw_index==index?'indicator_color':''" class="indicator"> </div> </div> </div> </template> <script> /* eslint-disable */ export default { name: "JvSwiper", porps: {}, data() { return { indicator: true, jv_siwdom: 0, jv_siw_index: 0, }; }, created() {}, mounted() { let jv_interval = 3000,//滑动间隔 jv_duration = 300,//运动时间 jv_indicator = true;//指示器,轮播的小点点 try { jv_interval = this.$refs.swileng.attributes.interval.value;//使用过程中设置的属性参数 jv_duration = this.$refs.swileng.attributes.duration.value; jv_indicator = this.$refs.swileng.attributes.indicator.value; } catch (error) { } this.indicator = jv_indicator;//把用户设置的或者默认的运动直接存储一下 let siwdom = this.$refs.swileng.childNodes,//获取有用户设置了多少张轮播 slef=this, cont = 0, box_left = 0; this.jv_siwdom=siwdom.length - 1; //给负责渲染层的变量赋值,让它生产多少张轮播 let seti = setInterval(() => {//执行 SwiRotste(); }, jv_interval); function SwiRotste() { cont += 1; //进来就累加一次 if (cont == siwdom.length - 1) { //如果等于最后一个 cont = 0; } slef.jv_siw_index=cont; //把当前的值赋值给jv_siw_index,告诉我们当前滑动到哪一张 box_left = 100 * cont; for (let i = 0, s = siwdom.length - 1; i < s; i++) { //给每个div添加不同的translateX值及运动时间 siwdom[i].style.transform = `translateX(${-box_left}%)`; siwdom[i].style.transition = `${jv_duration / 1000}s`; } } } }; </script> <style> .jv-swiper { width: 100%; height: auto; background-color: slategrey; display: -webkit-inline-box; overflow: hidden; position: relative; } .indicator-box{ display: flex; position: absolute; bottom: 12px; right: 6px; } .indicator { width: 6px; height: 6px; border-radius: 100%; background-color: #333; margin: 0 3px; } .indicator_color{ background-color: #fff; } </style> 1.2、然后在jv-swiper文件夹新建swiper-item.vue ,该vue其实为swiper的swiper-item
<template> <div class="swiper-item"> <slot></slot> </div> </template> <script> export default { name: "swiper-item", porps: {} }; </script> <style> .swiper-item { width: 100%; height: 100%; z-index: 9999; } .swiper-item img { width: 100%; height: auto; } </style> 二、在jv-swiper同级新建jv-index.js用了统一注册组件
/* eslint-disable */ import JvSwiper from './jv-swiper' import SwiperItem from './jv-swiper/swiper-item.vue' const JvIndex={ install:function(Vue){ // Vue.component()是用来注册全局组件的 Vue.component("jv-swiper", JvSwiper); Vue.component("swiper-item", SwiperItem); } } export default JvIndex 三、在mian.js 注册一下
import JvIndex from './components/jv-index' Vue.use(JvIndex) 四、开始使用啦~
<template> <div class="hello"> <h1>{{ msg }}</h1> //第一个轮播 <jv-swiper interval='5000' duration='400' indicator='true'>//设置自定义属性,这几个( interval、duration、indicator)属性都需要放子啊标签上哦 <swiper-item v-for="(item, index) in img" v-bind:key="index"> <img :src="item" alt=""> </swiper-item> </jv-swiper> //第二个轮播 <jv-swiper interval='3000' duration='400' indicator='true'> <swiper-item v-for="(item, index) in img" v-bind:key="index"> <img :src="item" alt=""> </swiper-item> </jv-swiper> </div> </template> <script> /* eslint-disable */ export default { name: "HelloWorld", props: { msg: String }, data() { return { img: ['http://m.xuelejia.com/static/images/lunbo2.jpg','http://m.xuelejia.com/static/images/new-banner2.png','http://m.xuelejia.com/static/images/lunbo3.jpg'] }; } }; </script> <!-- Add "scoped" attribute to limit CSS to this component only --> <style scoped> h3 { margin: 40px 0 0; } ul { list-style-type: none; padding: 0; } li { display: inline-block; margin: 0 10px; } a { color: #42b983; } </style> 好了大功告成,下面为效果图
总结:
主要利用Vue.component()注册全局组件
使用 this.$refs.swileng.attributes 获取用户设置的参数,不知道各位大佬有没有更好的方式,求介绍
使用this.$refs.swileng.childNodes获取用多少张轮播,不知道各位大佬有没有更好的方式,求介绍
滑动效果使用了translateX 使用 slot 实现用户在组件标签内插入html代码 个人感觉自己写的代码还是有点小乱,还需改进提升